Hand-Building

Add Texture with Clay Stencils

Clay stencils are a fast way to add texture and design to your handmade pottery.

They create texture you can feel, with the option to layer in color while the stencil holds everything neatly in place. Use them to create repeatable surfaces for trays, plates, mugs, tiles, and more without carving every line by hand, and to build rich texture that makes your glazes break, pool, and shine.

Time

15 Minutes

Skill

Beginner+

Age

Ages 8+

Supplies + Tools

  • Clay
  • Rolling pin
  • Clay Stencils
  • Optional: colored slip, underglaze, brushes, clay cutters, forms, cornstarch
Get Ready

Start with a rolled slab at your desired thickness. If you need a refresher, check out our Roll a Slab guide.

  • If you’re using our rolling pin rings, use the BLACK rings to roll the slab.
  • Let the slab rest until the surface is soft and smooth, but no longer shiny or tacky. It should still be flexible and easy to press into. If it sticks to your fingers, wait a few minutes; if it cracks when you bend the edge, it’s too dry.
  • (Optional, but helpful when working with sticky clay) Lightly sprinkle cornstarch (or dry release) over the slab and use a soft, dry brush to sweep it across the area you’ll be texturing. You just want a thin, even layer so the stencil doesn’t stick.

Overview

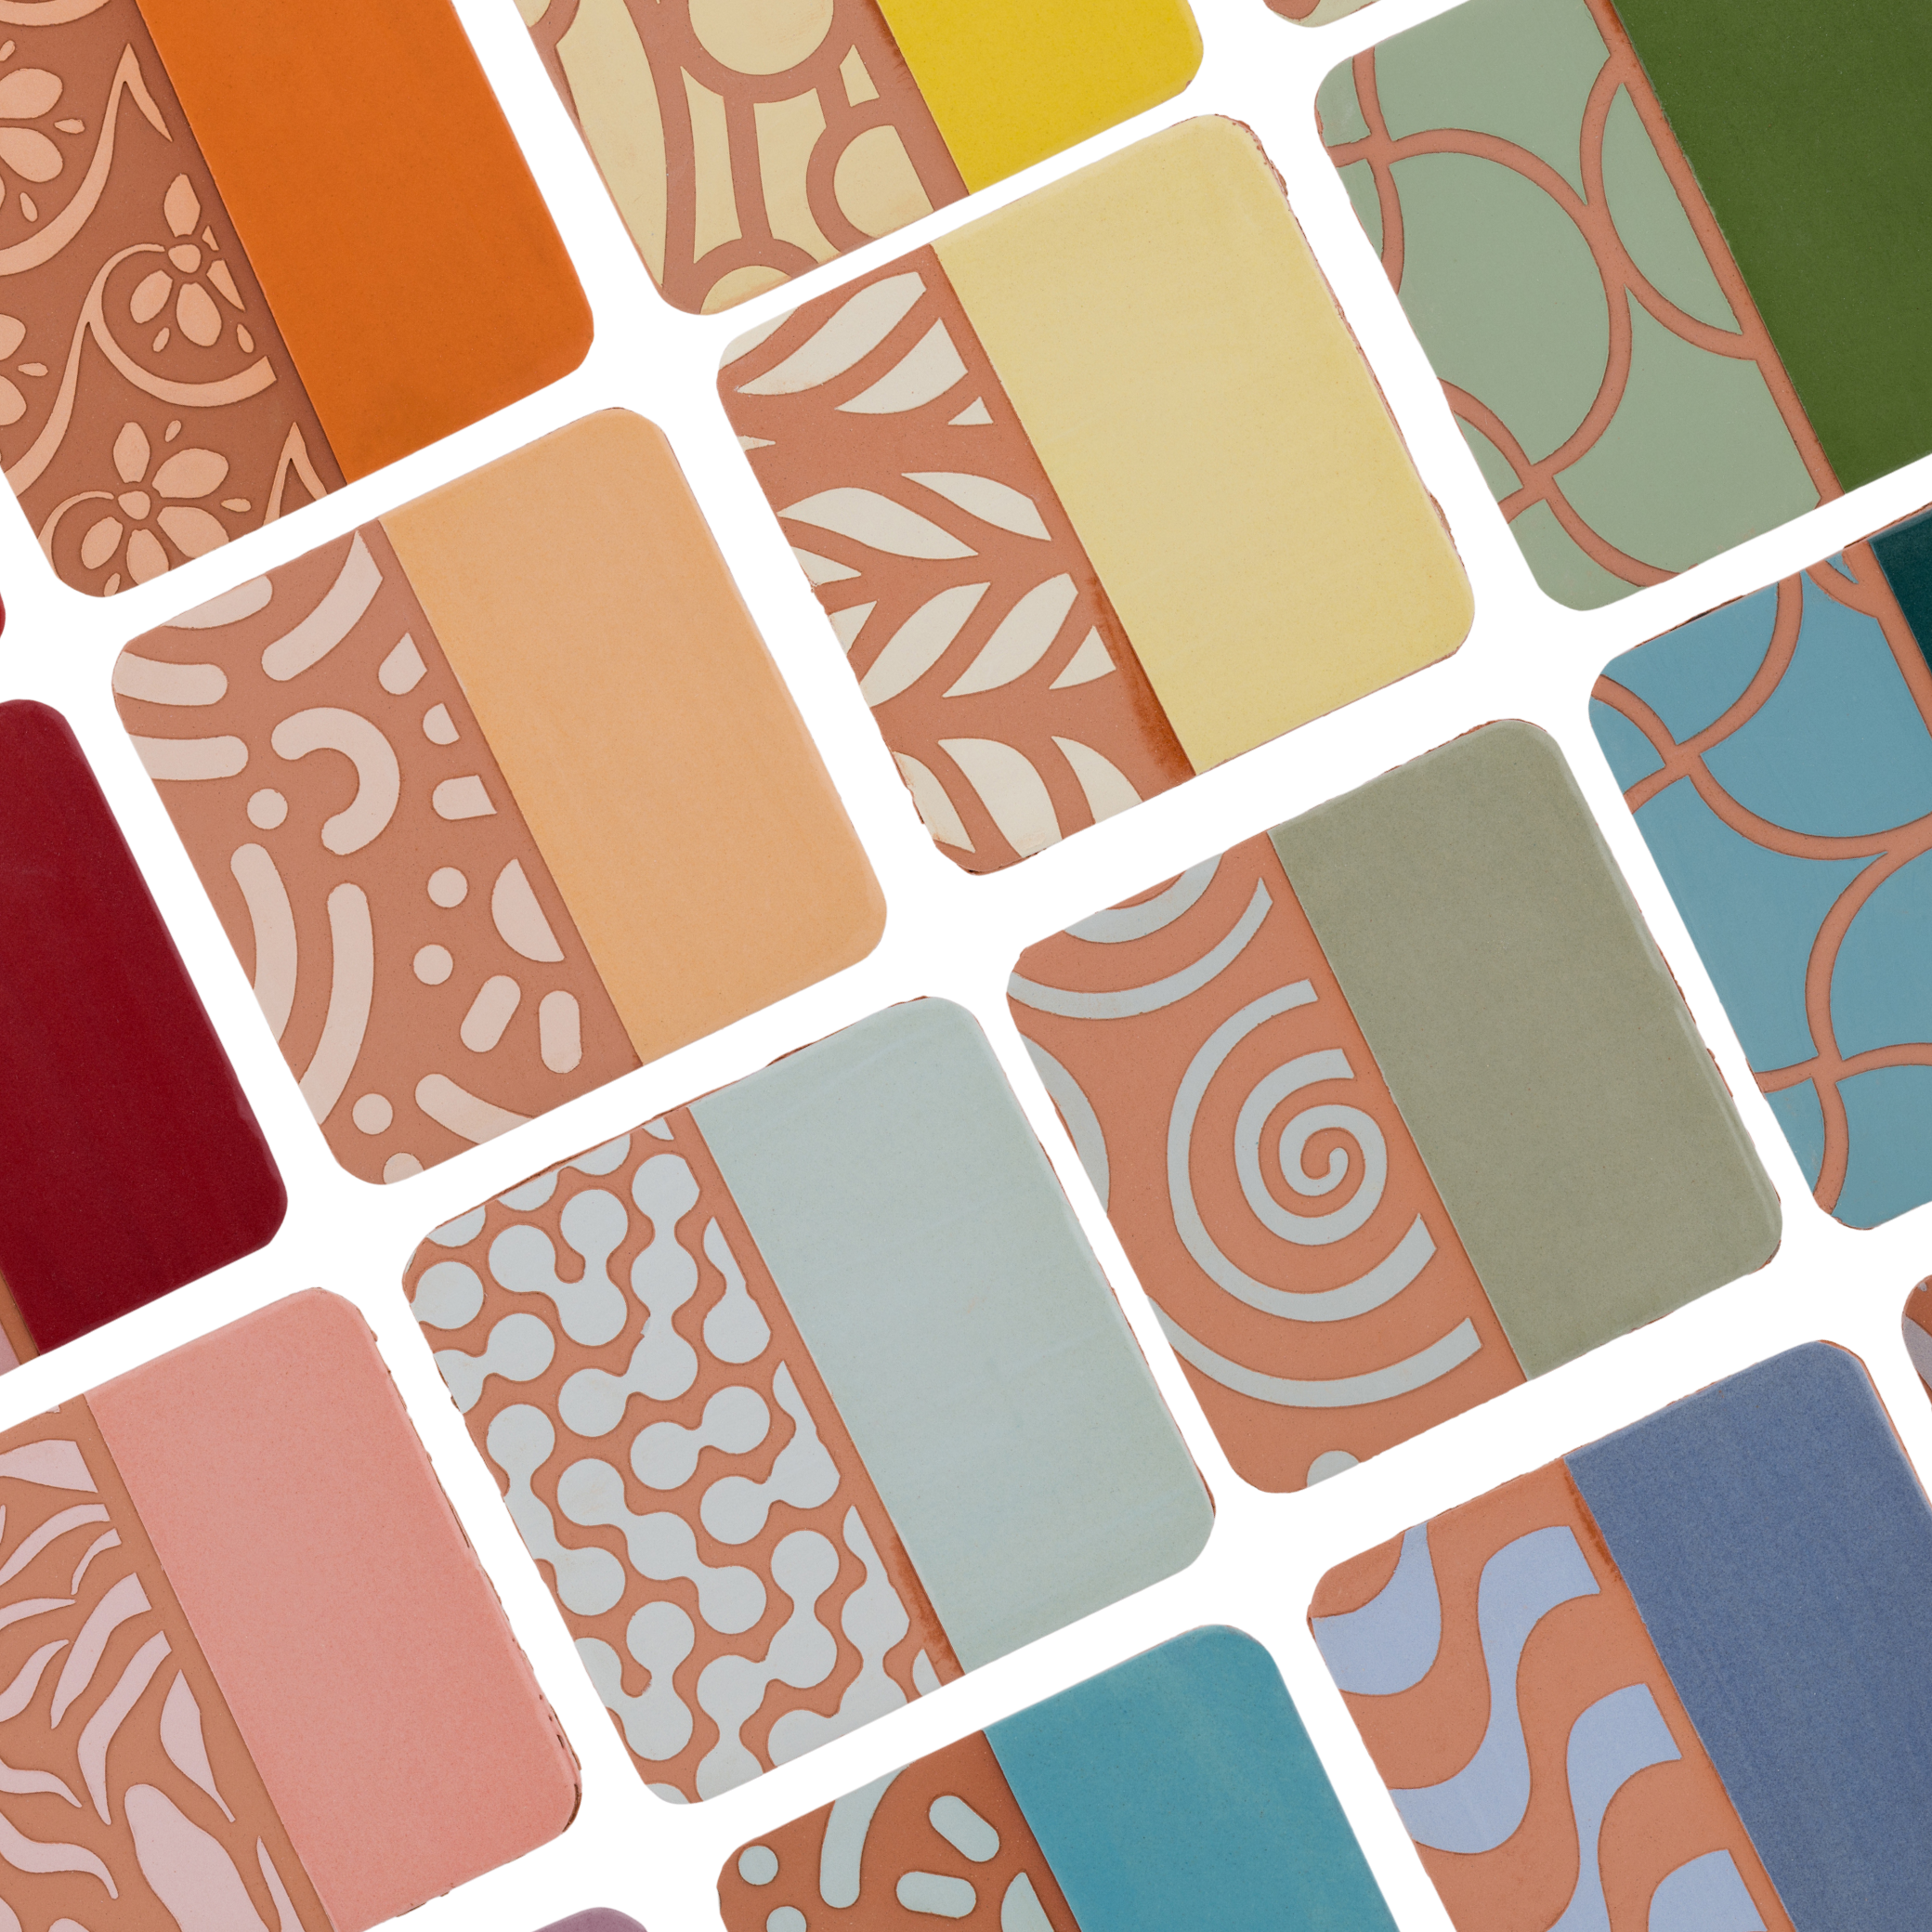
1. Choose your stencil + coverage

Decide if you want full coverage or just a rim/face design.

2. Place stencil on slab

Lay the stencil flat on the slab where you want the texture to be.

3. Smooth stencil into the clay

Gently press and smooth from the center outward so the stencil sits tight against the clay with no bubbles, wrinkles, or lifted edges.

4. Roll to press the pattern

Using your rolling pin (with pink #2 rings if you have them), keep the rings on the table, not on the clay or foam work mat, and roll in a few slow, even passes until the clay is level with the top of the stencil.

5. (Optional) Add slip or underglaze

While the stencil is still in place, use a soft brush or sponge to dab slip or underglaze through the openings for added color, avoiding any scrubbing so it doesn’t bleed under the edges.

6. Peel stencil for the reveal

Peel the stencil up from one corner in a smooth motion to reveal the texture and/or color, then set the slab aside for your next step (cutting, forming, or drying).

Safety
  • Wipe up spilled slip right away (before it dries) to minimize dust
  • Don’t leave very thick slip sitting in stencil openings; heavy buildup can crack, flake off, or cause glaze issues later
  • Avoid sanding textured areas bone-dry; if you need to soften an edge, use a damp sponge or soft tool to keep dust down
  • Keep cornstarch and dry materials under control, wipe your table with a damp sponge instead of brushing everything into the air.
  • If it’s hard to grab an edge, use a needle tool to gently lift one corner, then peel with your fingers in one smooth pull.
Tips
  • For face + rim sets, place and smooth the face stencil first, then add the rim so things shift less when you roll.
  • Keep rolling pin rings on the table, not on the clay or foam mat, and roll until the clay is level with the top of the stencil.

1. Stencils + coverage

Pick a stencil that fits the size and shape of what you’re making. Full-coverage stencils are sized to cover most or all of your slab or form. Face stencils decorate the center “face” of a plate, tray, or tile. Rim stencils decorate just the border and leave the center clean. Decide if you want pattern across the whole piece or just on the rim/face area. If you’re not sure where to start, you can check our Stencil Size Guide.

2. Position Stencil

Place the stencil on your prepared slab where you want the pattern to show. If you're using a stencil larger than you final form/cutter, make sure you place the stencil where ou'll be able to get the desired part of the design within your border so it isn't cut off.

3. Smooth it out

Gently press and smooth the stencil from the center outward so it sits against the clay. Check for bubbles, wrinkles, or lifted edges and press those areas down with your fingers or a soft tool. The stencil should feel flat and snug on the slab, good contact here gives you crisp texture and cleaner edges when you add color.

4. Roll

Using your rolling pin, roll over the stencil starting at one edge.

  • Try to roll in one motion with even pressure.
  • Your pressure should be light, but smooth. If the clay starts coming up above the stencil, you’re using too much pressure

Make sure all areas of the stencil were pressed into the clay. If you notice any spots that have gaps, gently go over it again with your rolling pin. If you’re going to add color, this is super important for maintaining clean lines!

5. Add color (Optional)

With the stencil still in place, use a soft brush or sponge to gently dab (sponge) slip or underglaze over the stencil. Aim for an even coat and avoid scrubbing back and forth, which can push color under the edges.

6. Peel + Reveal

Starting at one corner, peel the stencil up and back in a smooth, steady motion. Avoid sliding it across the surface so you don’t smear the texture or color. If it’s tricky to grab, use a needle tool or other pointy tool to gently lift up one edge before peeling with your fingers. Set the slab aside for your next step (cutting, forming, or drying).

TIP: With slip, don’t wait for it to fully dry before you peel, if it dries too much, the edges of your design will want to move with the stencil and it'll look less neat. With runny underglaze, let it dry a little more so it doesn’t drip or splatter when you lift.

Rinse or wipe the stencil so it’s ready for next use. For complex stencils, it can be helpful to press the stencil onto something flat (like a bat or board) and wipe it with a damp sponge while it’s stuck down so the tiny cutouts don’t stretch or tear.

SHARE WHAT YOU MADE

We want to see what you made! Tag us @smashedstudio or #smashedstudioproject

Shop by collection